Tuesday, August 27, 2013

Nature's Pest Management

While I was out picking tomatoes,
I came across Nature's way of controlling hornworms.
The white things are eggs/larvae of a Braconid Wasp.
The wasp lays the eggs on the live caterpillar, 
and the young feed on it.
And it dies.

Monday, August 5, 2013

Chocolate Zucchini Bread


I came across a recipe for a chocolate zucchini bread and thought
what the heck
I have more zucchini than I know what to do with.
Since my fiance said it was "DELICIOUS"
and "GREAT"
I figured I'd share it here.

Ingredients:
2 1/2 Cups all purpose flour
1/2 cup cocoa
1 teaspoon baking soda
1/2 teaspoon baking powder
1 teaspoon salt
1 1/2 cup sugar
3 eggs
1 cup canola oil
2 teaspoons vanilla
2 cups shredded zucchini
1 cup chocolate chips

Preheat oven to 350
In a large mixing bowl combine flour, cocoa, baking soda, baking powder and salt
set aside

In medium mixing bowl, beat sugar and eggs until fluffy
add oil and vanilla

add to dry ingredients along with the zucchini and chocolate chips
stir until combined
divide between 2 loaf pans
bake 50-60 minutes or until top is cracked and springy to touch

I think it could have used a few more chocolate chips, other than that it was pretty good.
Goes down nice with a tall glass of ice cold milk!
Check back for other possible zucchini bread recipes as I plan on trying a zucchini pineapple recipe 
and a lemon poppy seed zucchini bread recipe.


Friday, August 2, 2013

Preserving Pumpkins

It might seem a little early to start talking about pumpkins,
but I had some that were ripe.
Actually, I only had 1 ripe one,
but because the pumpkin vines were decimated
I wanted to preserve what I had.
This is a pretty easy method that doesn't require peeling the pumpkin.


First, Cut off the stem and cut the pumpkin in half.
Oh, and preheat the oven to 350

Scoop out the guts with a spoon.

Spray a cookie sheet with non-stick spray 
and place the pumpkins flat on the sheet.

Bake at 350 until they're done.  
I don't have a specific time to cook them.
Small pumpkins won't take long, thick pumpkins will.
Basically you want the inside mushy.

Scoop out the pumpkin with a spoon
leaving the shell behind.

Let it cool
then bag it up and freeze.

I was thrilled with how easy this was.
This year, my pumpkin cookies will be made completely from scratch!
And I decided to plant  another hill of pumpkins
(and hope I can keep the squash bugs at bay).
Even though we won't have them for Halloween,
we'll have them for pumpkin pie, pumpkin bread and pumpkin cookies.

Thursday, August 1, 2013

Butterflies

Our back pasture is full of purple clover.
Purple clover and butterflies.
These photos can't describe the number of butterflies 
(I counted 23 just near the area I was standing in).


Wednesday, July 31, 2013

Freezing Corn


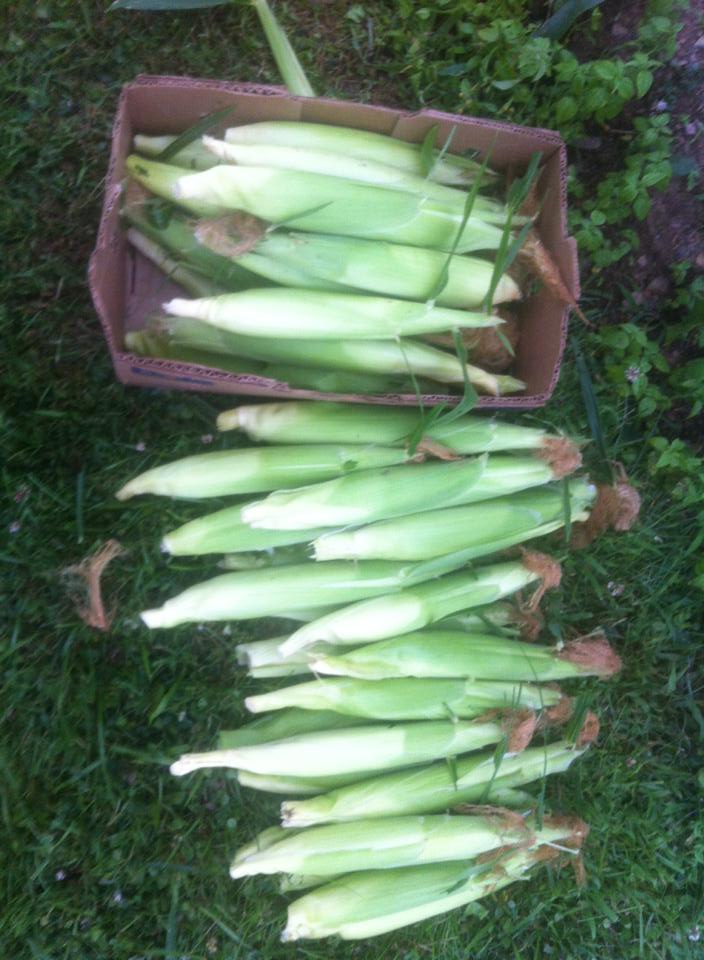
We managed to pick 46 ears of corn the other day.
Out of the 46 there were about 5 that weren't good either because of bugs,
bad spots or not being developed enough.
So after eating some, 
I had 30 something ears of corn to do something with.
I opted to freeze it, not because of my canning phobia,
but because many recommend freezing as the best method.
First you husk the corn.
Remove as much silk as possible- using a brush if needed.
The Corn then needs to be blanched,
so start a pot of water boiling while you husk.
Place cobs in boiling water for 4 minutes.

Immediately place cobs in a bowl of ice water.
This stops the cooking process.
Leave in the ice water for about the same amount of time you blanched them
(4 minutes).
Next, cut the corn off the cob.
There were suggestions to use a bundt pan to hold the corn.
This would work great if you have fat cobs.

I didn't, so I found that just holding it on a plate was better
(the cob kept sliding further into the hole in the pan.

Your corn will look clumped, but don't worry, 
it will break apart into single kernels when you bag it.
The finished product- 2 quart bags of fresh corn ready for the freezer.

Tuesday, July 30, 2013

There's An App For That

While checking out tips on canning
(because while I have obtained the tools, I'm still quite intimidated by the whole process)
I came across an app for my iPhone.
Seems Mother Earth News
has a free app for canning.
I of course downloaded it.
I'll let you know if it's helpful
(you know, once I get over my canning phobia).

Monday, July 29, 2013

Pickles in the Jar

 Sunday night I made 6 more quarts of refrigerator pickles.
My first batch was a success
with the exception of 1 pint of pickles that tasted totally of apple cider vinegar.
Despite that one issue, 
I went ahead with these 6 quarts. 
And as promised, here is the recipe:
Garlic Dill Refrigerator Pickles
Makes 3 pints- 2 pints=1 quart so double recipe makes 3 quarts
2 pounds cucumbers 
(I didn't really weigh any, I just cut up and used what would fit in the jar)
1 1/2 cups apple cider vinegar
1 1/2 cups water
2 Tablespoons pickling salt
6 garlic cloves (2 per jar)
1/4 teaspoon crushed red pepper per jar
1 teaspoon dill seed per jar
1/2 teaspoon black peppercorns per jar

Wash and slice cucumbers
In large saucepan combine vinegar water and salt, bring to simmer
Dole out spices to each jar
Pack cucumbers firmly into jars- you want them packed tight without damaging them
Pour the brine into the jars leaving 1/2 inch head space
Tap jars gently on counter top to dislodge any air bubbles
Apply lids and let jars cool
When they've reached room temperature place in refrigerator
Let them sit for at least 48 hours before eating.
Enjoy!