Showing posts with label preserving. Show all posts

Monday, July 28, 2014

Busy Weekend

It was a busy and productive weekend around here
for a change.
There was an abundance of produce on the counter that needed some attention.
And by abundance I mean
there was stuff on the counter.
Our harvests this year have been nothing like last year
and that's disappointing.
But I digress.
We have bugs decimating our cucumber plants
so I made sure I used the ones I managed to harvest.
I made 1 quart and 3 pints of refrigerator pickles.
Sadly, these won't last long.
You can find the recipe here.
Then I had a bunch of beets to contend with,
so I pickled them.
We'll see how they taste,
but at least they look pretty.
I also managed to can 2 quarts of green beans.
Hoping to save the cucumbers,
and hoping that the tomatoes on the vine
ripen soon.

Wednesday, October 23, 2013

Just Peachy!

Since I've managed to conquer my fear of canning
I've become a canning fool.
I have scoured canning cookbooks and marked recipes I want to try:
Brandied Apple Rings, Applesauce, 
Mint Jelly
and my famous Chicken Corn Soup
(though I'm still slightly apprehensive about canning meat).
When I went to the local store and saw they had some peaches, 
I grabbed some of those for some jam
(because Big E loves peaches and I love Big E)
The recipe I used was delish!

Vanilla Peach Jam

Ingredients:
8 cups peeled and chopped peaches (about 7 large peaches)
1/4 cup lemon juice
1 vanilla bean (or 3 tsp of pure vanilla extract)
2 cups sugar
1 Tbsp Bourbon (optional)
 
Put the peaches, lemon juice and sugar in a heavy bottomed pot or dutch oven
slice the vanilla beacn in half lengthwise and using the flat side of the knife
scrape out the seeds and place in pot along with the pod
(or dump in 3 tsp of pure vanilla extract like I did)
Bring to boil then reduce to a simmer.
Add the bourbon now if you're using it.
I didn't because I didn't have any
but next time I think I'll try it
(it's supposed to enhance the flavor of the vanilla)
 
Simmer for about 1 1/2 hours
stirring occasionally
Allow to cool slightly 
then ladle into jelly jars discarding the bean pods.
I canned this in a water bath canning method
for 20 minutes.

This was super easy to make because it didn't require constant stirring or attention
and used only a few ingredients.
It's definitely on the list to make more!
Plus, it made the entire house smell fantastic
and it tasted fantastic as well.
Can't wait to have some on some vanilla ice cream!

Wednesday, September 25, 2013

Roasted Garlic Pasta Sauce

When I finally got enough nerve to use my canner,
I picked an adventurous recipe: Roasted Garlic Pasta Sauce.
It is amazing.

The recipe makes about 3 quarts or 6 pints.

Ingredients:

6 bulbs of garlic
3 Tablespoons olive oil
4 medium red, yellow and/or green sweet peppers cut lengthwise and seeded
12 pounds ripe tomatoes Peeled
(to learn how to peel tomatoes, go here)
3 Tablespoons packed brown sugar
2 Tablespoons kosher salt 
(or 4 teaspoons regular salt)
1 Tablespoon balsamic vinegar
1 teaspoon freshly ground black pepper
2 cups lightly packed fresh basil leaves snipped
1 cup lightly packed assorted fresh herbs
(such as oregano, thyme, parsley and/or basil)
6 Tablespoons lemon juice

  • Preheat oven to 400 F
  • Cut off the top (about 1/2 inch) of the garlic bulbs to expose ends of individual cloves
  • Leaving garlic bulb whole, remove any loose papry out layers, place bulbs cut end up in a 1-1 1/2 quart casserole dish
  • Drizzle bulbs with 1 Tablespoon of the olive oil cover dish
  • arrange sweet pepper halves cut side down on foil lined baking sheet
  • brush with remaining 2 Tablespoons of oil
  • Roast garlic and peppers for about 40 minutes or until garlic feels soft and peppers are charred
  • Cool garlic in dish on wire rack
  • Bring foil up around peppers and fold edges together to enclose. Let peppers cool 15 minutes or until cool enough to handle Peel off and discard skins chop peppers and set aside.
  •  Remove garlic cloves from paper skins by squeezing the bottoms of the bulbs and place in food  processor.
  • Cut peeled tomatoes into chunks add some of the chunks to the garlic in the processor and process until chopped
  • Transfer chopped garlic and tomatoes to 7-8 quart stainless steel, enamel or non-stick heavy pot.
  • Working in batches repeat chopping the remaining tomatoes in the food processor.
  • Add all the tomatoes to the pot
  • Add brown sugar, salt, vinegar and black pepper to tomato mixture. Bring to boil
  • Boil steadily uncovered for 50 minutes stirring frequently
  • Stir in chopped peppers Boil for 10-20 minutes more or until it reaches desired consistancy stirring occasionally 
  • Remove from heat and add basil and assorted herbs
  • Spoon 1 Tablespoons lemon juice into each of 6 sterilized pint jars (or 2 Tablespoons in each 3 quart jars)
  • Ladle sauce into jars leaving 1/2 inch headspace
  • Wipe jar rims, adjust lids and screw bands.
  • Process in boiling water canner for 35 minutes (time starts when water returns to boiling)
  • remove jars and cool on wire racks.
The sauce looks gorgeous, smelled gorgeous while cooking 
and tastes amazing.
Note that I pressure canned my sauce at 11pounds of pressure for 15 minutes.

This is a time consuming recipe.
Because I really like the flavor of the sauce, 
I'm willing to take the time to make it
but I think I'll prepare the tomatoes one day
and assemble the sauce on another.

Tuesday, September 24, 2013

How To Peel a Tomato

Peeling a tomato seems like a tedious task,
but it's actually pretty simple.
First, cut an "X" on the bottom of the tomato.
Not a deep cut, just cutting into the skin.
Then, blanche the tomatoes for 30-60 seconds.
I did mine around 45 seconds on average.
Immediately remove the tomatoes from the boiling water and place them in ice water.
You'll go through a lot of ice if you have a lot of tomatoes,
so it might be a good idea to have a bag of ice on hand.
Once they're cooled (which doesn't take long)
the skins pretty much slide right off.  
It's really that easy!
I also discovered that to peel tomatoes and 
make sauce is an all day project.
You can peel the tomatoes one day
and refrigerate them till the following day 
to save on time.

Monday, September 23, 2013

The Pressure Canner

I purchased this Presto Pressure canner from Amazon some time ago
after I thoroughly read each review
(OK, maybe not each one since there were a lot, but a good many).

And once I had it at my house
it became apparent that I have a canning phobia.
It does not have its own name on the phobia list but it should.
Eventually the prospect of having wasted $70 for the canner,
not to mention the wasted tomatoes,
prompted me to go ahead and attempt to can and not blow up the house.
 The result?
I managed to can 3 quarts of Roasted Garlic and Pepper Spaghetti Sauce
(it's delish! I'll share the recipe in the future)
 I also realized that I didn't blow up the kitchen
and it doesn't appear that I will kill anyone with botulism either. 
I have since managed to can several quarts and pints of chopped tomato
and 7 jars of red pepper jelly.  
This canning thing is a cinch!

Friday, August 2, 2013

Preserving Pumpkins

It might seem a little early to start talking about pumpkins,
but I had some that were ripe.
Actually, I only had 1 ripe one,
but because the pumpkin vines were decimated
I wanted to preserve what I had.
This is a pretty easy method that doesn't require peeling the pumpkin.


First, Cut off the stem and cut the pumpkin in half.
Oh, and preheat the oven to 350

Scoop out the guts with a spoon.

Spray a cookie sheet with non-stick spray 
and place the pumpkins flat on the sheet.

Bake at 350 until they're done.  
I don't have a specific time to cook them.
Small pumpkins won't take long, thick pumpkins will.
Basically you want the inside mushy.

Scoop out the pumpkin with a spoon
leaving the shell behind.

Let it cool
then bag it up and freeze.

I was thrilled with how easy this was.
This year, my pumpkin cookies will be made completely from scratch!
And I decided to plant  another hill of pumpkins
(and hope I can keep the squash bugs at bay).
Even though we won't have them for Halloween,
we'll have them for pumpkin pie, pumpkin bread and pumpkin cookies.

Wednesday, July 31, 2013

Freezing Corn


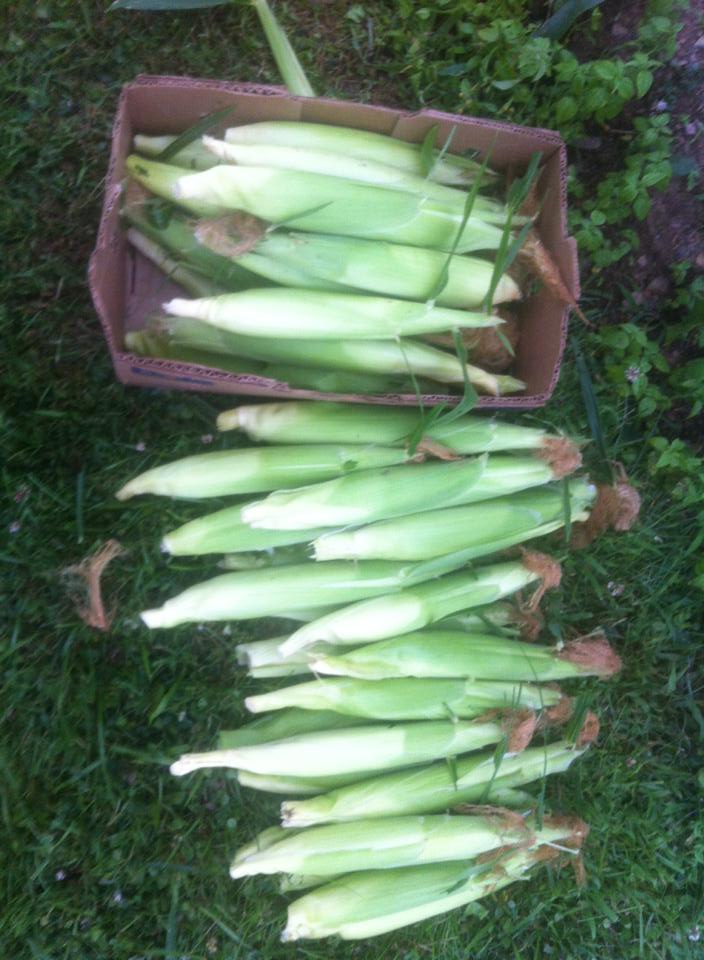
We managed to pick 46 ears of corn the other day.
Out of the 46 there were about 5 that weren't good either because of bugs,
bad spots or not being developed enough.
So after eating some, 
I had 30 something ears of corn to do something with.
I opted to freeze it, not because of my canning phobia,
but because many recommend freezing as the best method.
First you husk the corn.
Remove as much silk as possible- using a brush if needed.
The Corn then needs to be blanched,
so start a pot of water boiling while you husk.
Place cobs in boiling water for 4 minutes.

Immediately place cobs in a bowl of ice water.
This stops the cooking process.
Leave in the ice water for about the same amount of time you blanched them
(4 minutes).
Next, cut the corn off the cob.
There were suggestions to use a bundt pan to hold the corn.
This would work great if you have fat cobs.

I didn't, so I found that just holding it on a plate was better
(the cob kept sliding further into the hole in the pan.

Your corn will look clumped, but don't worry, 
it will break apart into single kernels when you bag it.
The finished product- 2 quart bags of fresh corn ready for the freezer.

Monday, July 29, 2013

Pickles in the Jar

 Sunday night I made 6 more quarts of refrigerator pickles.
My first batch was a success
with the exception of 1 pint of pickles that tasted totally of apple cider vinegar.
Despite that one issue, 
I went ahead with these 6 quarts. 
And as promised, here is the recipe:
Garlic Dill Refrigerator Pickles
Makes 3 pints- 2 pints=1 quart so double recipe makes 3 quarts
2 pounds cucumbers 
(I didn't really weigh any, I just cut up and used what would fit in the jar)
1 1/2 cups apple cider vinegar
1 1/2 cups water
2 Tablespoons pickling salt
6 garlic cloves (2 per jar)
1/4 teaspoon crushed red pepper per jar
1 teaspoon dill seed per jar
1/2 teaspoon black peppercorns per jar

Wash and slice cucumbers
In large saucepan combine vinegar water and salt, bring to simmer
Dole out spices to each jar
Pack cucumbers firmly into jars- you want them packed tight without damaging them
Pour the brine into the jars leaving 1/2 inch head space
Tap jars gently on counter top to dislodge any air bubbles
Apply lids and let jars cool
When they've reached room temperature place in refrigerator
Let them sit for at least 48 hours before eating.
Enjoy!